

 中文 (中国)
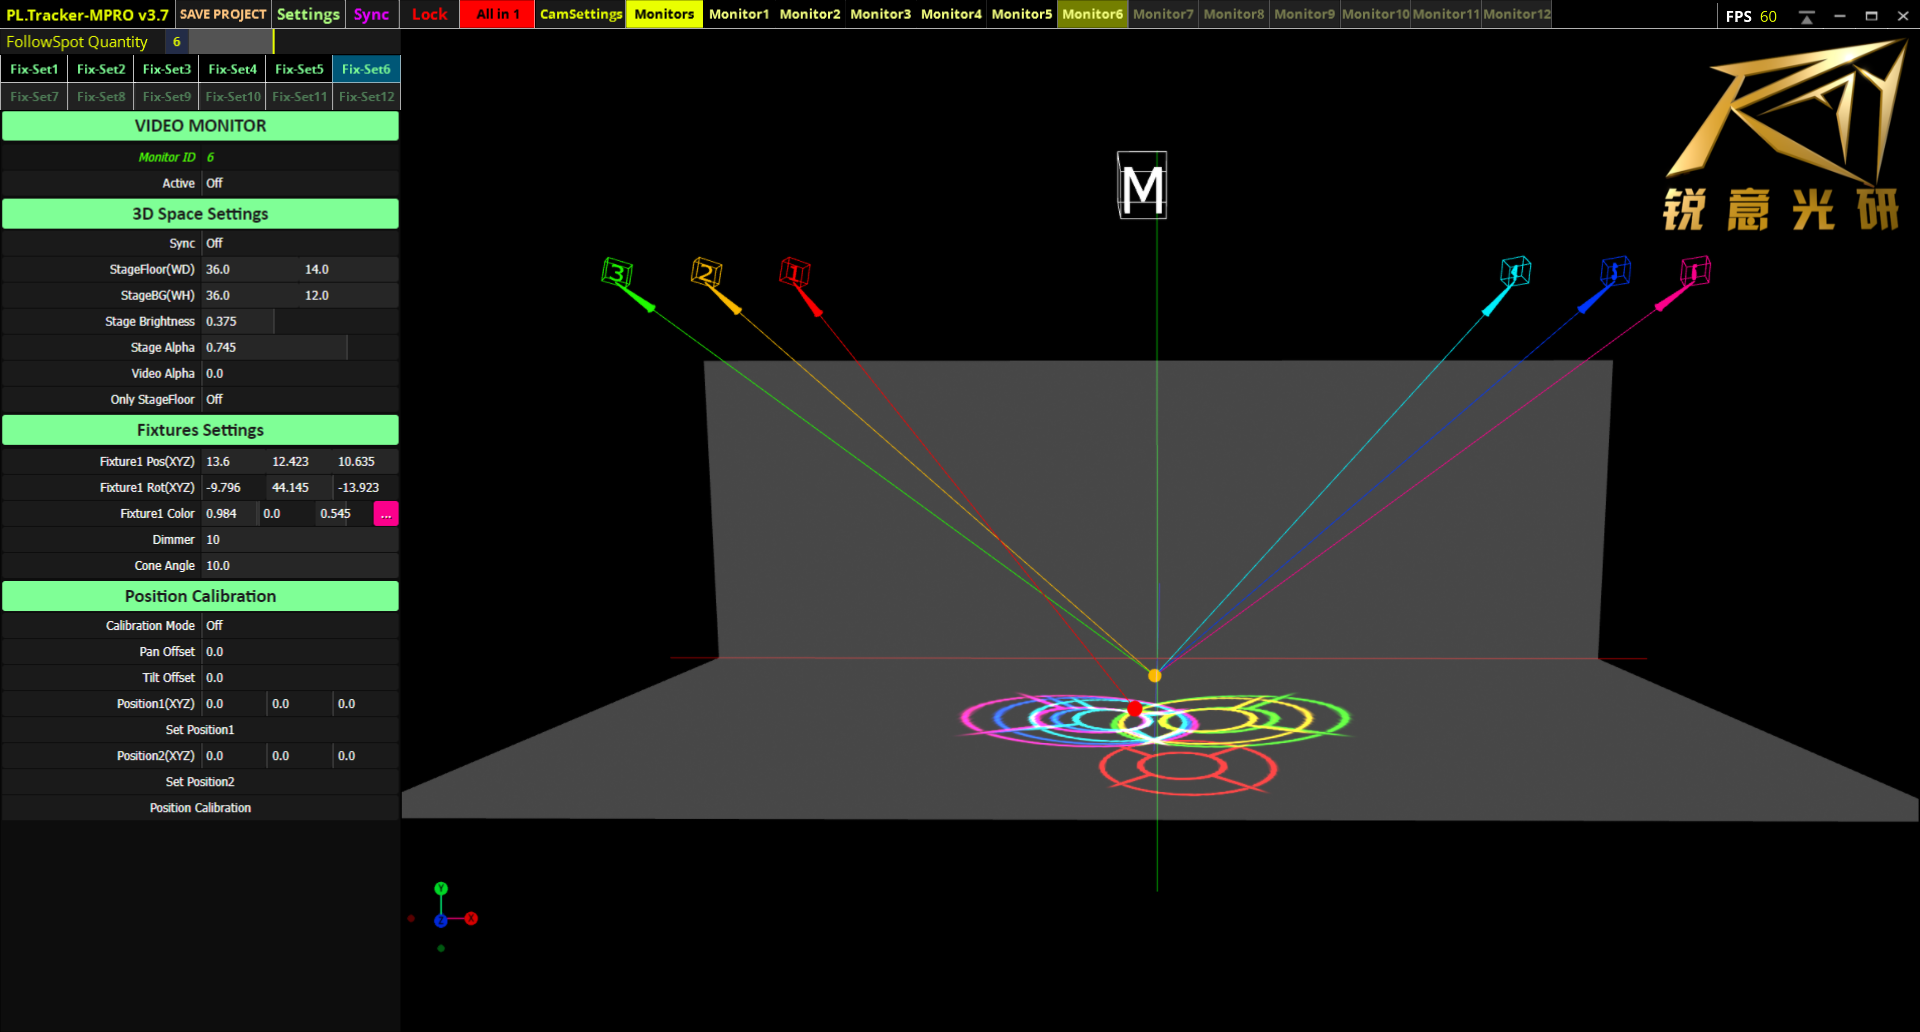
PL.Tracker MPRO is the advanced version of the manual version. The difference between MPRO and the regular manual version is that it supports multi-domain output and introduces the industry’s first virtual master control function. This function allows operators to control the lights intuitively without considering the actual position and orientation of the lights, which is especially useful for lights hanging on the sides or back. Additionally, the light position calibration function from the automatic version has been introduced. This function allows you to quickly obtain the light positioning when it is inconvenient to measure the light position.
Update Content:
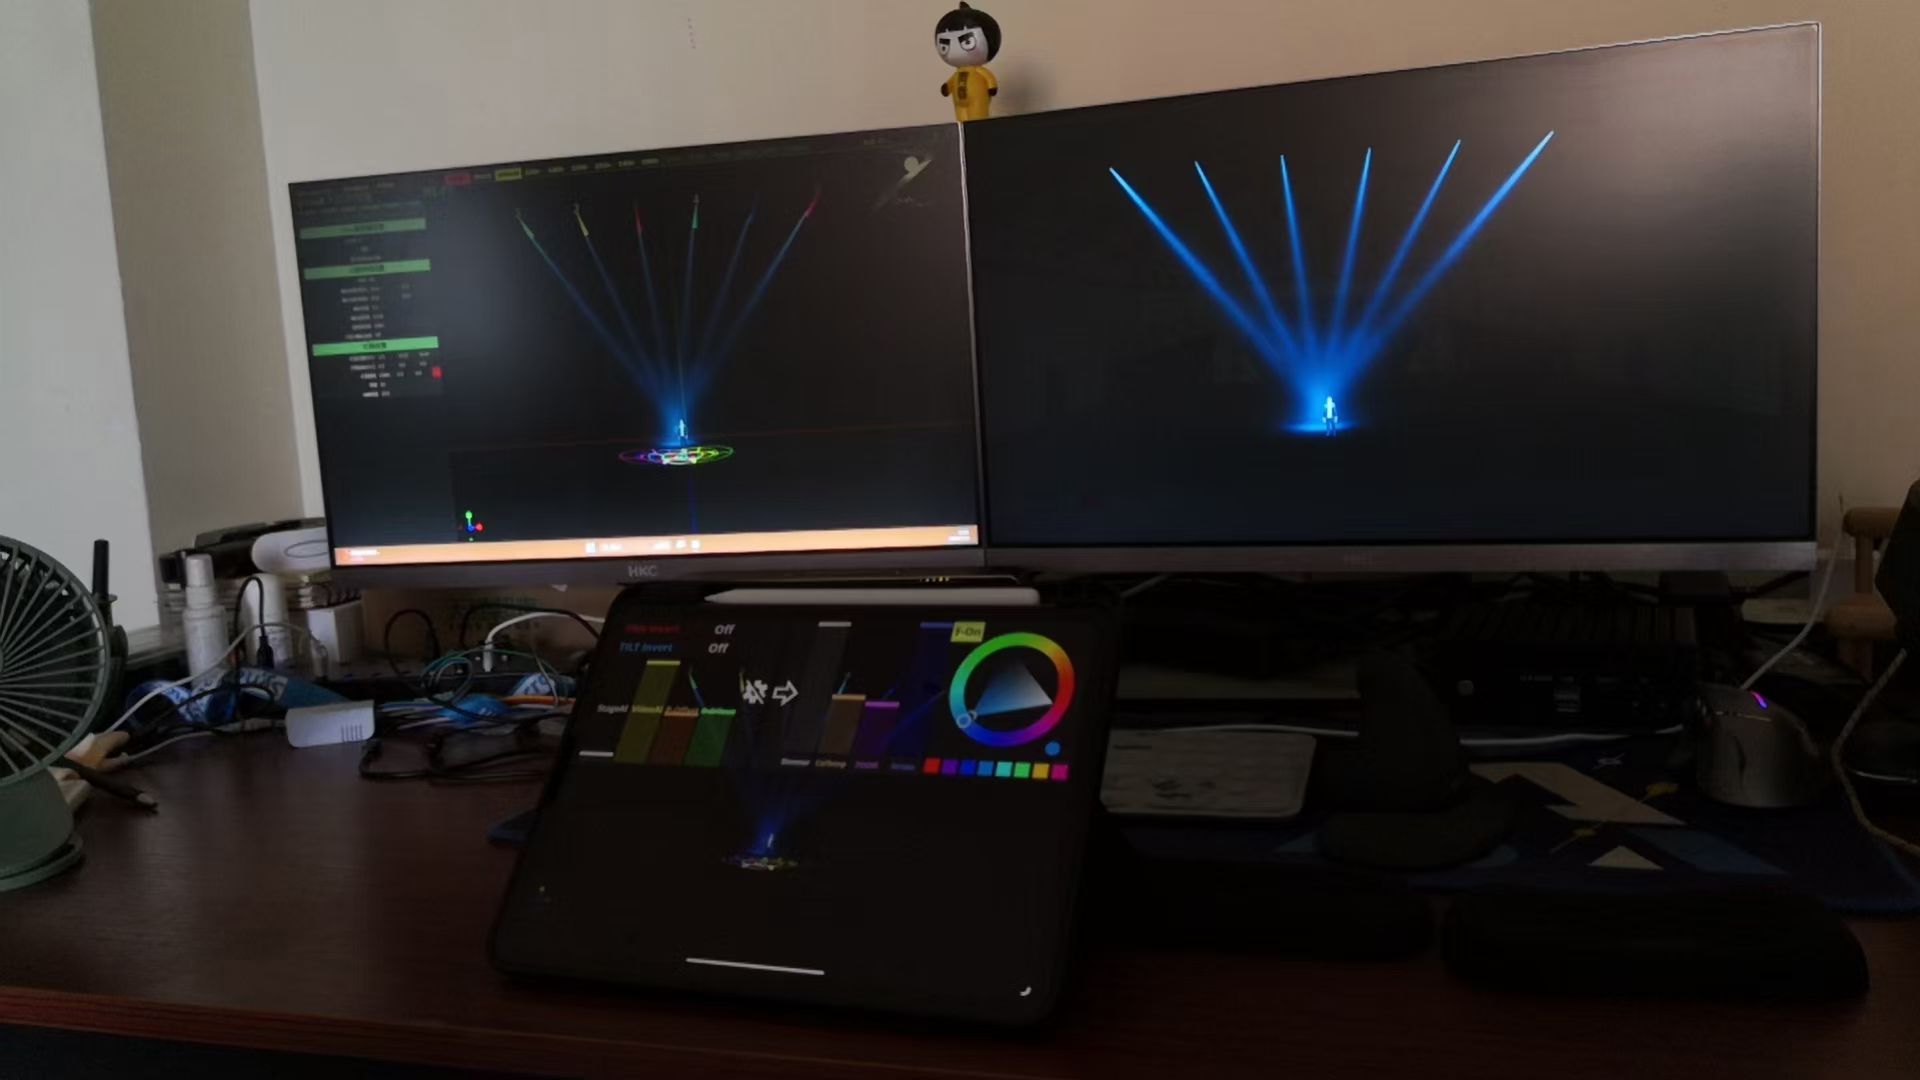
- First, for the iPad version, a dedicated app is available, which makes the connection between the iPad and the server more stable and faster. This is especially suitable for situations where multiple iPads are used for control. The difference from the Android version is that the Android version uses the server screen extension mode for remote control. Therefore, when there are multiple control ends, the requirement for network bandwidth will be higher. When connecting with an iPad, please set the activation switch in the figure below to On. For the Android version, after installing the corresponding remote application and connecting, set the monitor ID and click full screen directly.

- Virtual Master Control Function. The goal of this function is to control all lights as if they were at the position of the virtual master control light, so you don’t have to consider the actual position and orientation of the lights. You only need to set the virtual master control light to an appropriate position relative to the main view. With this new function, the follow mode on all light setting pages has also been changed. Specifically, except for Light Setting 1, all other light settings can switch the follow mode between following the virtual master control target and following the virtual master control target of Light 1. The regular version switches between following Light 1 target and its own target. The follow mode of Light 1 is similar to the regular version. When activated, other lights will automatically follow the virtual master control target of Light 1. Of course, operators of other lights can also switch this follow mode to exit the follow mode at any time.
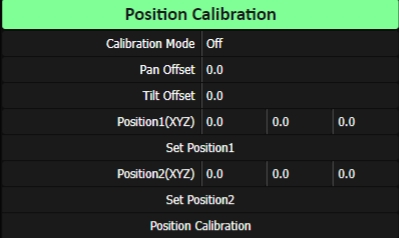
- Position Calibration Function. This function is located in the corresponding monitor settings and can help you quickly locate your light position. Of course, if you can measure the light position more accurately, please use the manually measured data as the standard.

To use this function, first select two coordinate points on the stage as calibration points. The first point can be the origin of the coordinates, and then select another position coordinate according to the actual position of the light. If the light is at the front of the stage, you can choose a coordinate point on the X-axis as the second point. It will be much easier to determine the actual coordinates of these points on the stage. If the light is on the sides of the stage, it is best to choose a point on the Z-axis as the second coordinate point.
After setting the coordinates of the two points, we can activate this calibration mode. At this time, two white lines will be displayed to indicate the connection lines between the calibration points and the light position. Next, adjust the corresponding PT axis adjustment options to control the PT axis to point to Point 1. For better observation, it is best to set the light ZOOM value to the minimum. After confirming that the beam is aligned with the coordinates of Point 1, click Set Point 1, and the corresponding white line will be set to align with the connection line between the light position and Point 1. Similarly, perform the same operation for Point 2. After these two white lines are set, you can click Calibrate Position to automatically set the light position.
After setting the light position, remember to switch to the OFF state to exit this calibration mode. Then confirm that there is no significant deviation from the actual light position. If there is a noticeable misalignment, please check the settings of the corresponding point coordinates and the light angle range.
This function only sets the light position. The actual rotation orientation of the light still needs to be adjusted according to the actual installation orientation and the actual beam direction. When the rotation axes XYZ of the light are all 0, it is the normal hanging state. We usually need to pay attention to the PT axis inversion problem and the deviation of the P axis from the actual position. If there is a deviation, you need to adjust the Y-axis rotation value of the light.
Operation Tips
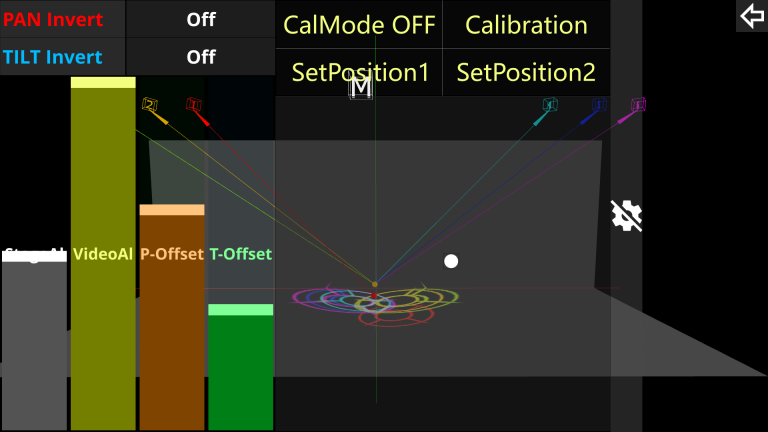
- When performing position calibration, you can try to use an iPad or Android tablet for operation. The PT axis adjustment area is located at the bottom right of the settings interface on the left side of the tablet. This will make the actual operation more convenient. You can even take the tablet to the stage for more accurate calibration.
- Additionally, the synchronization option in the three-dimensional space settings can also synchronize the coordinates of the two points. Therefore, after setting the coordinates of the two points under Monitor 1, you can switch this synchronization option to keep the corresponding options of other monitors synchronized and updated.
- If you need to operate in conjunction with an MA console, make sure to pay attention to the settings of the corresponding mixing rules when performing DMX mixing. If set to HTP, the PT axis values of the corresponding lights on the console side should be kept at the minimum, and the PT axis speed should be set to the fastest. If the PT axis of the light does not respond when you are controlling the light with a tablet or phone, you need to check that the PT axis speed channels on both the console side and the control side are set to the fastest speed. For other channels of the light, such as patterns, they should also be set in advance through the channel page to avoid affecting normal operation. The corresponding channel names can be changed as needed.
